I’ll be at the NEC in Birmingham on Saturday 27 February for the Caravan, Camping and Motorhome Show 2016!
Come along for a meet-and-greet plus some handy gardening demonstrations.
Details
12pm – 1pm: I’ll be doing a signing and gardening demonstration at the Haven Ownership stand. Come and meet me in Hall 4, Stand 4350.
4.30pm:Interview with me on the Discovery Theatre. I’ll be talking about plants, pots and perfect gardens!
Come and find out about Love Your Garden and my Chelsea Flower Show designs, as well as my top container gardening tips and advice on creating gardens for caravans and holiday homes.
Gardening for caravan and holiday home owners has become a really popular hobby. In fact, Haven has seen more than 20 gardening clubs established across its sites!
So come along and find out how you too can get gardening.
Clay soils bring many gardeners out in a cold sweat. They have a reputation as back-breaking and impossible to work with. But the truth is that clay soils can be truly brilliant in a garden.
They are rich in nutrients and retain plenty of moisture, two important things that plants need to grow well. In fact, many plants thrive in these conditions.
Here’s my guide to handling clay soils, including how to improve them and a list of the best plants for clay soils, in both full sun and partial shade.
First, it helps to understand what we mean by clay soil. This type of soil has a structure made of very fine particles which sit closely together, meaning that air and water cannot easily move through the soil. This is what makes it ‘heavy’ and it can lead to poor drainage. The biggest problem with clay soil is that it gets waterlogged. This can slow the growth of plants and even cause the roots to rot.
Clay soil is also heavy to dig and slow to warm up in spring. But these issues are outweighed by the potential clay soil has to be the foundation for a wide range of plants.
If you aren’t sure what type of soil you have, use the simple test in my Expert Gardening Guide to Soil. Almost all clay soils can be improved over time.
But the most important problem to tackle is bad drainage, especially when it is causing standing water.
Dig the soil over very deeply, incorporating lots of bulky organic matter as you go.
Compost, leaf mould, coarse grit and well-rotted bark chips are good options.
Be wary of putting in too much bark or wood chippings – the bacteria needed to breakdown this amount of wood will deplete the soil of nitrogen.
Many sources recommend digging in sharp sand but this is not effective. You would need a huge volume of sand and even then the results are very variable. Organic matter is the far better option. You should also dig in organic matter if you are starting a new bed or tackling a new plot. It is hard work but it will make a dramatic difference to the quality of your soil. You can improve clay soil in sections too – no need to turn over the entire plot at once.
Some clay soils respond well to the addition of a liming agent like calcium. This can cause the clay particles to form clumps, improving the structure and drainage.This tends to work best on acidic soils.
If you don’t know your soil pH, test with a cheap kit from a garden centre.
Add lime to acidic soils as per the packet instructions. For other soils you can also try adding gypsum. This may help the clay structure without affecting the acidity. Test both of these methods on a small area first to make sure it works on your type of clay soil.
It might take a few seasons but be consistent with it for the best results. Make sure to keep mulch clear of plant stems to avoid rotting – here’s my top mulching tips. Plus you should also consider adopting a no-dig system once you have tried to improve the soil. Turning it over deeply every year may disturb the hard work of soil creatures and microorganisms.
There is a huge range of plants that will grow on clay soil. Always check the specific variety for its suitability for heavy soil and be sure that it is happy with the light levels of its new home too. Where possible aim for spring rather than autumn planting so new plants have warm, dry weather while they get established. However, plant woody varieties like trees in early autumn while the soil is still dry.
There are a huge range of shrubs that will thrive in clay soil. As a general rule, they cope better with wet conditions when they are larger and better established.
Look for cornus, viburnum, mahonia, berberis, pyracantha and cotoneaster for structure.
Many of these plants have evergreen leaves or colourful berries too. And you can grow flowering shrubs in clay soil, like weigela, buddleja, forsythia, hydrangea and chaenomeles (flowering quince).
[/fusion_text][fusion_text]
Roses are also good shrubs for clay especially if it has been improved with organic matter. Some are even tolerant of wet soils, including the rugosa group. Your choice is only limited if your clay soil is also in shade.
Perennial plants are well suited to clay soils and will do much better than delicate annuals. And once they get established they can produce stunning displays. Fill shady spots with lush greenery from hostas, lingularia and euonymous. Vinca and alchemilla mollis also make good ground cover options. Flowering herbaceous perennials for clay include the daisy family like asters, rudbeckia and coreopsis, as well as woodland plants like phlox, aconites, hellebores and Japanese anemone.
Bedding plants like geraniums, primulas, cranesbill and pulmonaria will all thrive in clay soil, especially in sunny spots. Astilbe, astrantia, kniphofia and solidago are great plants for clay soil in full sun or light partial shade.
Some hardy plants will thrive in clay soils in part and even full shade. Try ivy, hosta, vinca, ajuga, aucuba, dryopteris (fern) and Japanese anemones to fill shade gardens. Plus shrubs like viburnum, hydrangea, mahonia and chaenomeles all like clay soil in partial shade, and may tolerate full shade too.
Clay soils are slow to warm up in spring, making them poor for early vegetable varieties. But main crop vegetables that are harvested in summer and autumn are perfect for clay soils, and often have very strong yields thanks to the soil’s high nutrient and water content.
Most of the classic veg garden crops will grow in clay soil, including brassicas like cabbage and cauliflower, plus squashes and pumpkins and bulbs like onions and leeks.
The only condition is that they need plenty of sunlight – most vegetable plants hate shade!
I love container gardening because it allows you to put plants anywhere, even right by your front door. That’s especially important in spring, when the garden is still coming to life – I want see a bit of colour!
Planting containers with bright spring colour is sure to put a smile on your face. Flowers lift our mood and it’s exactly what we need in this damp, drab weather.
There are loads of plants to add a splash of spring colour to your garden. Here’s a few of my favourite spring flowers, plus a step-by-step tutorial on how to plant up stunning spring containers.
How to plant spring colour in containers
Step 1: Check the drainage
Good drainage is very important in container gardening. If water gets trapped in the plant pot, air can’t get to the plant’s roots and it may rot and die. The problem is even worse in spring, which is a typically wet time of year.
Most flower pots and containers should come with some drainage holes already in the bottom. But I always drill a few extra ones into plastic or wood containers, just to be safe.
Add a layer of gravel or broken pottery to the bottom of the container. This stops the drainage holes getting blocked by lumps of compost.
Half fill your container with general purpose compost, and you’re ready to plant!
Step 2 – Choose your plants
The best container gardens make use of larger containers with several plants in them. This helps create a mix of height, shape and colour for a stunning display.
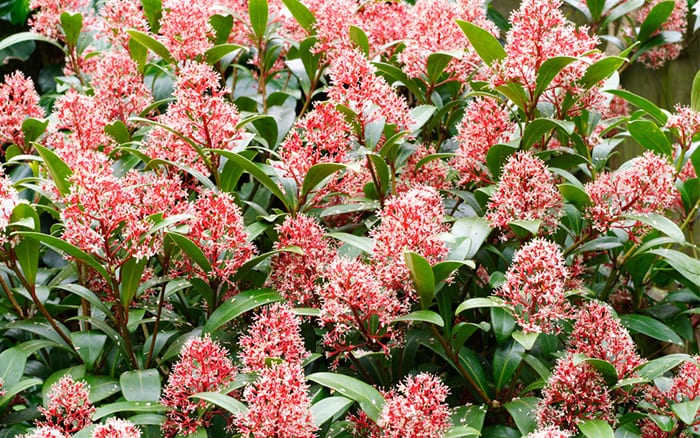
I always start with a centrepiece. This is usually a bigger feature plant that goes in the middle. In the video above, I’m using a Skimmia.
Great spring centrepieces
Skimmia japonica
Dwarf conifer (Cupressus Goldcrest is good)
Hebe
Osmanthus burkwoodii
Viburnum
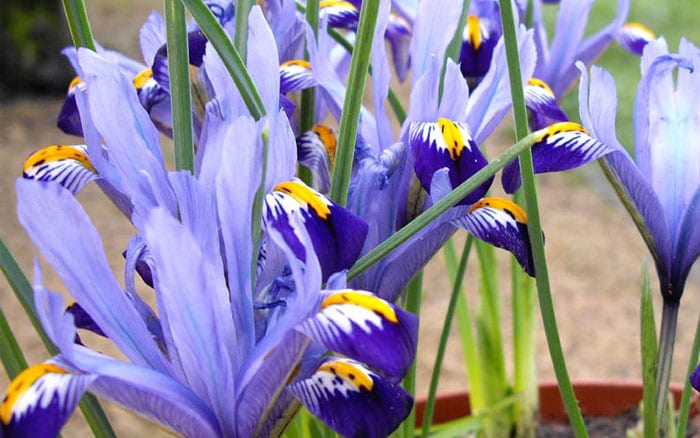
Tall spring bulbs like daffodils and tulips
Around the centrepiece you need lower-growing, colourful bedding plants and flowerings varieties. In the video I use a selection of primroses, which have a vivid flower colour and nice leafy foliage.
Start with the large centrepiece. Carefully take off the pot and place the plant in the middle of the container. Nestle it into the compost so it sits straight and fill in with compost to hold it in place.
Next make small holes in compost around the edges where the bedding plants will go. Remove them from their pots and plant them as you did with the centrepiece.
Aim to make the container feel full and lush – nothing looks sadder than a half-empty flower pot. Firm in the soil to hold the plants in place and top-up with more compost if there are any gaps.
Try to get the final compost level a couple of centimetres below the rim of the pot. If you fill the container right to the top, compost will spill out when you try and water it. Now give the container a good water.
Step 4 – Where to put your spring container
Make the most of your spring containers by putting them somewhere you can see them clearly. This may be by the front door or on the patio near the kitchen window.
If you place your container against the side of the house you might need to give it a bit of extra water. This is because it will sit under the eaves and won’t get as much rainfall.
You can also lift pots up onto pot feet to help drainage. I use old wine corks!
Your stunning spring container should give you months of pleasure. Make sure to refresh it when the bedding plants start to die with some summer-flowering varieties like fuchsias and geraniums.