It was another great episode for series 4 – here’s what we learned from the show this week. Plus find out what plants we used to make the most of smaller spaces!
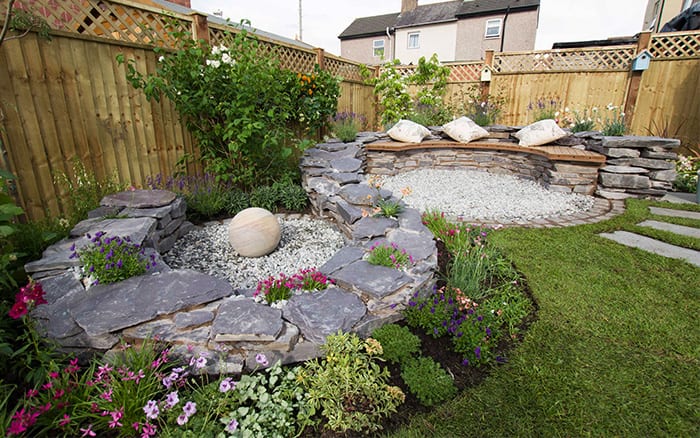
1 Small gardens are tricky
This was the smallest garden we’ve ever done on the show, but I know that it’s a reality for so many people. I hope we showed that a lack of space does not stop you having a great garden!
The main thing to remember is to use less hard landscaping materials – two or three will suffice. And don’t fill it with small features! They make it feel disjointed and cluttered. Choose a couple of big, complementary features for much more impact.
Everyone loves flowers, and you can fill your garden with them very easily. It’s not just about beds and borders – plant them in pots, ponds and crevices in walls and patios. For height, try climbers, window boxes and vertical walls. And don’t forget the front garden!
Plus mix annuals in with your perennials. Annuals are great for instant colour and they are smaller than established perennials, so they don’t compete for root space in the soil. We used poppies, cosmos, nemesia, geraniums and petunias.
3 You can do lots with a balcony garden
No space is too small to host a garden! Make it immersive by putting plants and flowers all around you – in containers, up walls and on the floor too! Follow my tip for stunning windowboxes – make holes in the lining and push plants through it to get overflowing colour! Trailing plants like ivy or petunia surfinia are also great for wall containers.
With smaller spaces, simplicity is key. Stick to a simple colour palette, and choose a range of flowers and foliage that complement each other.
4 It’s easy to attract butterflies
They make a great addition to any garden, and the good news is that they love flowers! We used sedum, salvia, lavender, dianthus and philadelphus on the show, but the choice is huge! Butterflies also love thrift, phlox, catmint, marigolds, wallflowers and buddleja, obviously!
You can also attract them by making a feeder that mimics the nectar they love so much. Find out how here.
5 Put plants on the roof too
I loved the green roof on the shed! It’s a great way to naturalise your garden structures and improves the view from the bedroom window. Choose low-growing plants that will withstand any wind up there, such as sedum, saxifrage and other alpines.
Follow Alan’s advice and drench the root ball before you plant them – it will ensure they don’t dry out!
By now your garden projects should be coming into or are in full bloom, so remember to keep photographing it! Even if these aren’t the final photos for your entry, you can show the judges and the Cultivation Street team just how your projects have progressed and developed. Remember to create a record for yourselves.
Here are our top tips for making sure you capture the best angle!
[/fusion_text][fusion_text]
Front Gardens/Streets
[/fusion_text][fusion_text]
Make sure you take photos of the whole street or single project from the road and pavement. For multiple front gardens its best looking down the street, to show how all the gardens come together. Finally snap some front-facing shots looking into each garden.
Remember to hide wheelie bins and other distractions, and keep taking progress photos as your plants bloom and grow.
[/fusion_text][fusion_text]
School Gardens
[/fusion_text][fusion_text]
Keep a photographic record of your projects to remind the children of their achievements. We and the judges absolutely love to see snaps of the kids getting stuck in with their hands dirty!
When you take photos, try to include everything and get a few different angles. You can also try kneeling down to get a child’s-eye view of the garden.
For the judges, the rules are similar to those above. Take snaps of the whole project, then focus in on some of your favourite details. Try and get before and after shots to show the judges (and yourselves) what a difference your projects have made.
We want to see people! Get some members of the community in the photos! There’s no need to be camera shy!
You can also take photos through the seasons, to show how your gardens are coming along. It’s easy to forget how lovely the spring bulbs looked when your garden is full of autumn fruits and flowers!
[/fusion_text][fusion_text]
Quick tips to taking a good photograph
[/fusion_text][fusion_text]
Consider the light – How is it interacting with your garden and where is it coming from? A light source coming from side angles will create a more interesting photo.
Keep it simple – Don’t try and cram too much into your frame.
Perspective – Give a few different angles a try! Kneel, lie down, crouch or even raise your camera higher than normal.
Be aware of backgrounds – Hide those wheelie bins, remove any rubbish etc. So many great photos can be ruined by not considering what’s actually in the whole frame.
People! – Provide photos of your projects and then show us who works on them and who’s involved.
Break the rules – Experiment and fundamentally HAVE FUN!
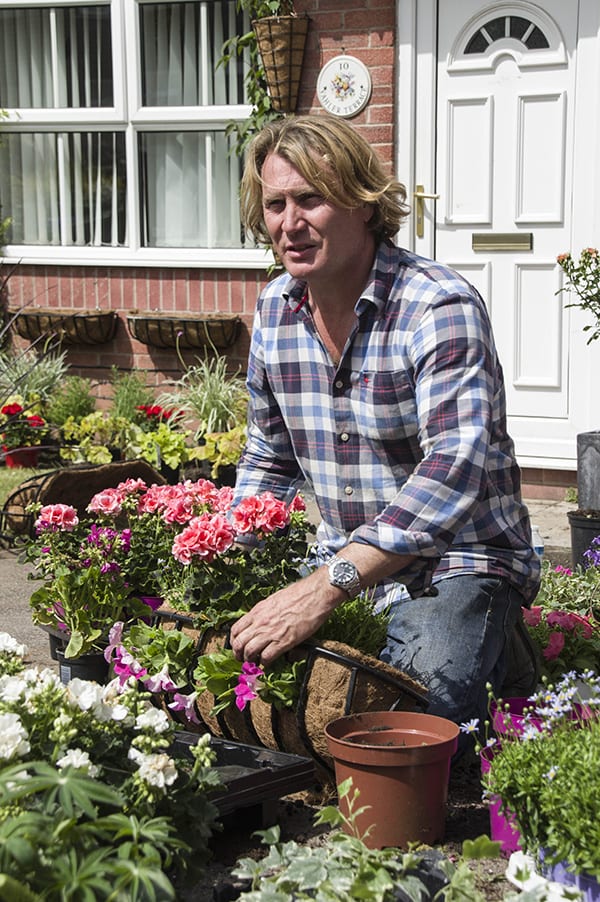
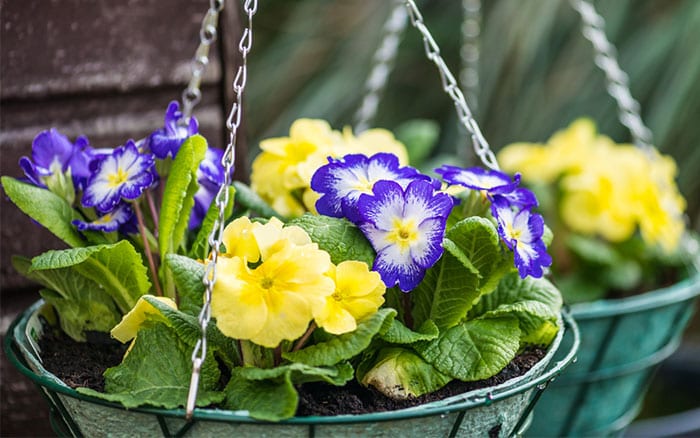
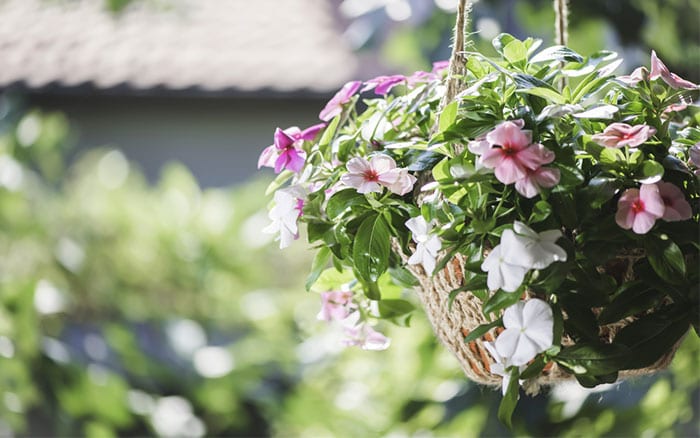
Hanging baskets are great fun and give you loads of colour and pleasure all summer. They are great for bringing flowers to walls, porches, windows and doorways. They have a reputation for being high maintenance, but I’ll show you some simple tricks to get luscious blooms for months on end!
Choose your basket
There are two main types of basket: containers, which are any solid sided tub, and the traditional wired basket.
The secret is to get the biggest possible basket or container. The bigger it is, the more soil it will hold, meaning more moisture and more nutrients. Moisture is key during the summertime to make sure your plants don’t dry out.
Preparation – containers
The most important thing is to check for drainage. If water can’t drain away, the soil will become waterlogged andyour plants will die.
Some containers, such as wicker ones, come pre-lined with plastic. Make sure you punch a few holes in the bottom of the lining so the water can drain out.
Plastic tubs usually have drainage holes drilled in the bottom, but it’s worth putting crocs in there too. This means a layer of gravel or broken pottery to stop compost blocking up the drainage holes.
Preparation – wired
This type of basket is usually wire mesh with a moss lining. Rounded baskets tend to roll about when you’re trying to line and plant them, so balance it in the top of a bucket or plant pot to keep it still.
Line the bottom of the basket with the moss, bringing it about halfway up the sides. If you leave a gap, you can push some plants and flowers through the metal above the moss, making your basket look fuller.
Now line that with newspaper. This stops compost falling through any gaps in the moss, plus it rots down nicely, adding extra nutrients to the soil.
Filling
It’s best to buy hanging container compost to fill your baskets. It’s more expensive, but you’ll save money in the long run because your plants will last longer.
First, it contains a wetting agent, which means you can water it when it’s very dry without doing any damage. Secondly, it contains extra nutrients to feed your plants as they grow
Add compost to your basket until it’s about three-quarters full. Don’t over-fill it – leave space for your plants’ root balls.
When the basket is finished, there should be a 2cm gap between the top of the basket and the compost level. If it is too full, water will run off the surface and down the sides rather than soaking in when you water your baskets.
Hydration
If you want to be clever, help your plants even more by adding failsafe moisture. You can use hydration crystals to the compost, which are little jelly crystals that store moisture and release it when the soil gets dry.
Or you can put a water slice in the bottom of the basket before your compost goes in. This is like a dry pepperoni slice, but it’s actually a polymer. When it’s soaked with water, it turns to a saucer-sized gel that stores the excess moisture every time you water the basket.
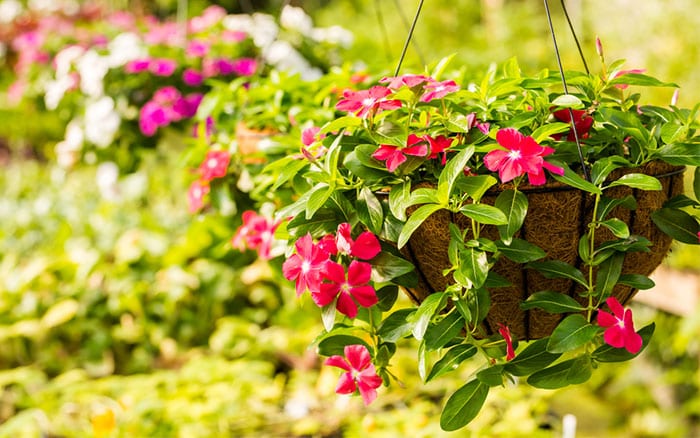
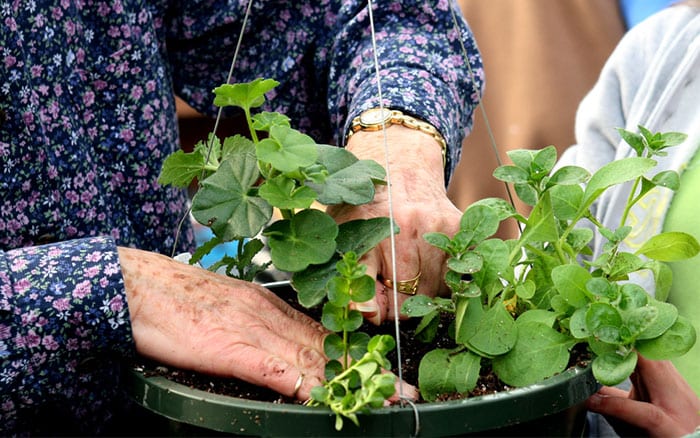
Planting
The best thing to do is to choose three types of plants: one upright central plant, trailing plants that go round the outside and fillers that really give the basket volume.
Start with the big plant. Dig a hole in the centre, put your plant in it and firm well in. For the other plants, think of the basket as a clock face. Plant your trailers around the outside at 12, 4 and 8 o’clock, or 12, 3, 6 and 9 o’clock. Then add your filler plants in between and top-up with compost. Do not over pack the basket – leave some space for the plants to develop.
Fuchsias or geraniums are classic centre plants – tall and brightly coloured. A typical trailer is ivy, which adds great evergreen colour. Or try lobelia, helichrysum or trailing geraniums for colour. Good fillers include Busy Lizzies or Begonia Semperflorens, which add extra volume.
If that’s too many plants, choose one bulky trailing plant such as Petunia Surfinia, which will run down the sides and underneath – it looks fantastic. Simply bed the plants together as one solid group and they’ll grow outwards.
Maintenance
Once your basket is planted, water it well. The compost may sink down and leave a gap – if so, add a bit more compost. Hang them in full sunlight and water when the soil starts to dry out. Water your plants with liquid fertiliser throughout their growing season, and remember to deadhead flowers to encourage more blooms.
And that’s it! Get great hanging baskets with minimal effort and watering.