[fusion_builder_container hundred_percent=”yes” overflow=”visible” type=”legacy”][fusion_builder_row][fusion_builder_column type=”2_3″ layout=”1_1″ background_position=”left top” background_color=”” border_color=”” border_style=”solid” spacing=”yes” background_image=”” background_repeat=”no-repeat” padding_top=”” padding_right=”” padding_bottom=”” padding_left=”” margin_top=”0px” margin_bottom=”0px” class=”” id=”” animation_type=”” animation_speed=”0.3″ animation_direction=”left” hide_on_mobile=”no” center_content=”no” min_height=”none” align_self=”flex-start” border_sizes_undefined=”” first=”true” last=”true” hover_type=”none” link=”” border_position=”all”][fusion_text]For the first Episode of Love Your Garden this year we were back in Hull, where we did a small garden on last year’s show. This was a small space again, and the small ones are always more challenging. You are always trying to make the garden feel more spacious as well as more interesting, and there is only so many people you can fit in at one time, so there’s a lot of toing and froing to make it work. Plus, at this site we had a very narrow passageway to access the garden, which made it a logistical nightmare at times.[/fusion_text][fusion_imageframe lightbox=”no” lightbox_image=”” style_type=”none” hover_type=”none” bordercolor=”” bordersize=”0px” borderradius=”0″ stylecolor=”” align=”none” link=”” linktarget=”_self” animation_type=”0″ animation_direction=”down” animation_speed=”0.1″ animation_offset=”” hide_on_mobile=”no” class=”” id=””] [/fusion_imageframe][fusion_text]Here’s Katie and I doing a selfie at the beginning of the day when our faces are smiling and free of mud, sweat and tears![/fusion_text][fusion_imageframe lightbox=”no” lightbox_image=”” style_type=”none” hover_type=”none” bordercolor=”” bordersize=”0px” borderradius=”0″ stylecolor=”” align=”none” link=”” linktarget=”_self” animation_type=”0″ animation_direction=”down” animation_speed=”0.1″ animation_offset=”” hide_on_mobile=”no” class=”” id=””] [/fusion_imageframe][fusion_text]Here is Frances with Matt from Frosts working on the front garden. We didn’t realise we were doing both the front and the back garden until we arrived, so that was a bit of a shock!
We had looked at the back garden when we got there and thought we can crack that out in no time, but then suddenly we had to split our teams and it became a very big job. So Frances took the front garden and Alan, Katie and I took the back.[/fusion_text][fusion_imageframe lightbox=”no” lightbox_image=”” style_type=”none” hover_type=”none” bordercolor=”” bordersize=”0px” borderradius=”0″ stylecolor=”” align=”none” link=”” linktarget=”_self” animation_type=”0″ animation_direction=”down” animation_speed=”0.1″ animation_offset=”” hide_on_mobile=”no” class=”” id=””] [/fusion_imageframe][fusion_text]This is Marcus from frosts who helped us create this lovely front path. I love the curved brickwork here as it sweeps round to the front door.[/fusion_text][fusion_imageframe lightbox=”no” lightbox_image=”” style_type=”none” hover_type=”none” bordercolor=”” bordersize=”0px” borderradius=”0″ stylecolor=”” align=”none” link=”” linktarget=”_self” animation_type=”0″ animation_direction=”down” animation_speed=”0.1″ animation_offset=”” hide_on_mobile=”no” class=”” id=””] [/fusion_imageframe][fusion_text]A couple of likely lads at work here: in the front we have Paul, who manages the task of finding all of the products for the gardens, and supervising it on the production side. This was his first episode on the show and he did a sterling job.
Just behind him is Kevin from Frosts who you may recognise from other blogs we’ve done. He’s our telehandler driver, and the precision with which he controls those machines is phenomenal.[/fusion_text][fusion_imageframe lightbox=”no” lightbox_image=”” style_type=”none” hover_type=”none” bordercolor=”” bordersize=”0px” borderradius=”0″ stylecolor=”” align=”none” link=”” linktarget=”_self” animation_type=”0″ animation_direction=”down” animation_speed=”0.1″ animation_offset=”” hide_on_mobile=”no” class=”” id=””] [/fusion_imageframe][fusion_text]Here is Frances making her containers in the field opposite the house, where we had to do some of our work and filming because it was just too congested on the property.
We often turn up and start looking at what we need to build, and then when we look for materials they say, “Can you make it out of pallets?”[/fusion_text][fusion_imageframe lightbox=”no” lightbox_image=”” style_type=”none” hover_type=”none” bordercolor=”” bordersize=”0px” borderradius=”0″ stylecolor=”” align=”none” link=”” linktarget=”_self” animation_type=”0″ animation_direction=”down” animation_speed=”0.1″ animation_offset=”” hide_on_mobile=”no” class=”” id=””] [/fusion_imageframe][fusion_text]This is Matt and Rob, part of the sound and film crew. As you can see, they’re in their rain gear as they get ready to cover the action, because we did have a few downpours that day.[/fusion_text][fusion_imageframe lightbox=”no” lightbox_image=”” style_type=”none” hover_type=”none” bordercolor=”” bordersize=”0px” borderradius=”0″ stylecolor=”” align=”none” link=”” linktarget=”_self” animation_type=”0″ animation_direction=”down” animation_speed=”0.1″ animation_offset=”” hide_on_mobile=”no” class=”” id=””] [/fusion_imageframe][fusion_text]Here you can see the bricks flying through the air as Kevin and Matt work on the front garden![/fusion_text][fusion_imageframe lightbox=”no” lightbox_image=”” style_type=”none” hover_type=”none” bordercolor=”” bordersize=”0px” borderradius=”0″ stylecolor=”” align=”none” link=”” linktarget=”_self” animation_type=”0″ animation_direction=”down” animation_speed=”0.1″ animation_offset=”” hide_on_mobile=”no” class=”” id=””] [/fusion_imageframe][fusion_text]This is a taste of what it’s like on the day: a delivery van arrives, but the crew want to film it, so everyone is hanging about while cameras and mics are set up, the delivery man is hanging about, and I’m thinking “Bloomin heck, I could have unloaded that by now!” But that’s the nature of working in television, and they are just looking to capture all of the important moments that bring the day together for you at home.
You can also see the catering van and marquee set up in the back in case of any hunger emergencies![/fusion_text][fusion_imageframe lightbox=”no” lightbox_image=”” style_type=”none” hover_type=”none” bordercolor=”” bordersize=”0px” borderradius=”0″ stylecolor=”” align=”none” link=”” linktarget=”_self” animation_type=”0″ animation_direction=”down” animation_speed=”0.1″ animation_offset=”” hide_on_mobile=”no” class=”” id=””] [/fusion_imageframe][fusion_text]This is Paul, a lovely guy who sourced loads of different products for us. I really liked the chimney pots that he brought in for this episode.[/fusion_text][fusion_imageframe lightbox=”no” lightbox_image=”” style_type=”none” hover_type=”none” bordercolor=”” bordersize=”0px” borderradius=”0″ stylecolor=”” align=”none” link=”” linktarget=”_self” animation_type=”0″ animation_direction=”down” animation_speed=”0.1″ animation_offset=”” hide_on_mobile=”no” class=”” id=””] [/fusion_imageframe][fusion_text]Here’s another one to show you what it’s like in action. You’ve got Frances working on the garden, Simon on his knees with the camera, Matt recording the sound, and our director Natalie in the middle.[/fusion_text][fusion_imageframe lightbox=”no” lightbox_image=”” style_type=”none” hover_type=”none” bordercolor=”” bordersize=”0px” borderradius=”0″ stylecolor=”” align=”none” link=”” linktarget=”_self” animation_type=”0″ animation_direction=”down” animation_speed=”0.1″ animation_offset=”” hide_on_mobile=”no” class=”” id=””] [/fusion_imageframe][fusion_text]This the passage we had to fit everything through. Blocking it on the left right here is Amy, a make-up artist, and Jim on the right who is the head of production and the real boss on the scene. He’s also brilliant because he assembles all of the flat pack. Last year he wasn’t with us on the shoots and I had to do most of it, so I’m well relieved to see Jim on site this season![/fusion_text][fusion_imageframe lightbox=”no” lightbox_image=”” style_type=”none” hover_type=”none” bordercolor=”” bordersize=”0px” borderradius=”0″ stylecolor=”” align=”none” link=”” linktarget=”_self” animation_type=”0″ animation_direction=”down” animation_speed=”0.1″ animation_offset=”” hide_on_mobile=”no” class=”” id=””] [/fusion_imageframe][fusion_text]Here’s a shot inside the garden where you can see Alan planting in the background, Sam in the middle, and Matt at the front. The colours in this garden were marvellous. You can see the Rhododendrons here and lots of herbaceous perennials with it. Stunning.[/fusion_text][fusion_imageframe lightbox=”no” lightbox_image=”” style_type=”none” hover_type=”none” bordercolor=”” bordersize=”0px” borderradius=”0″ stylecolor=”” align=”none” link=”” linktarget=”_self” animation_type=”0″ animation_direction=”down” animation_speed=”0.1″ animation_offset=”” hide_on_mobile=”no” class=”” id=””] [/fusion_imageframe][fusion_text]I loved the creativity of this planter using the bath tub with fake bubbles in it. It was a fun, fresh and entertaining feature.[/fusion_text][fusion_imageframe lightbox=”no” lightbox_image=”” style_type=”none” hover_type=”none” bordercolor=”” bordersize=”0px” borderradius=”0″ stylecolor=”” align=”none” link=”” linktarget=”_self” animation_type=”0″ animation_direction=”down” animation_speed=”0.1″ animation_offset=”” hide_on_mobile=”no” class=”” id=””] [/fusion_imageframe][fusion_text]Here’s a shot after the work was finished and everyone is getting ready for the group photo. As you can see, you can’t take a step without bumping into a camera!
That’s Lloyd on the left, then Rob, then Darren, Matt behind the tree, and Simon on the right all ready for action.[/fusion_text][fusion_imageframe lightbox=”no” lightbox_image=”” style_type=”none” hover_type=”none” bordercolor=”” bordersize=”0px” borderradius=”0″ stylecolor=”” align=”none” link=”” linktarget=”_self” animation_type=”0″ animation_direction=”down” animation_speed=”0.1″ animation_offset=”” hide_on_mobile=”no” class=”” id=””] [/fusion_imageframe][fusion_text]Here’s a cheeky shot of the wheelie bin cover I made with the alpine bed on top. I loved the opportunity, not only to construct it, but also to get my hands in with the plants. I’m a horticulturalist at heart, as well as a landscaper. I think this worked really well, both practically and aesthetically.[/fusion_text][fusion_imageframe lightbox=”no” lightbox_image=”” style_type=”none” hover_type=”none” bordercolor=”” bordersize=”0px” borderradius=”0″ stylecolor=”” align=”none” link=”” linktarget=”_self” animation_type=”0″ animation_direction=”down” animation_speed=”0.1″ animation_offset=”” hide_on_mobile=”no” class=”” id=””] [/fusion_imageframe][fusion_text]Alan here is filming his final bit as everyone looks round the completed garden.[/fusion_text][fusion_imageframe lightbox=”no” lightbox_image=”” style_type=”none” hover_type=”none” bordercolor=”” bordersize=”0px” borderradius=”0″ stylecolor=”” align=”none” link=”” linktarget=”_self” animation_type=”0″ animation_direction=”down” animation_speed=”0.1″ animation_offset=”” hide_on_mobile=”no” class=”” id=””] [/fusion_imageframe][fusion_text]Katie, Frances and myself here at the end of the day, all a little more red in the face as we did get some sun in the end.
I love container gardening because it allows you to put plants anywhere, even right by your front door. That’s especially important in spring, when the garden is still coming to life – I want see a bit of colour!
Planting containers with bright spring colour is sure to put a smile on your face. Flowers lift our mood and it’s exactly what we need in this damp, drab weather.
There are loads of plants to add a splash of spring colour to your garden. Here’s a few of my favourite spring flowers, plus a step-by-step tutorial on how to plant up stunning spring containers.
How to plant spring colour in containers
Step 1: Check the drainage
Good drainage is very important in container gardening. If water gets trapped in the plant pot, air can’t get to the plant’s roots and it may rot and die. The problem is even worse in spring, which is a typically wet time of year.
Most flower pots and containers should come with some drainage holes already in the bottom. But I always drill a few extra ones into plastic or wood containers, just to be safe.
Add a layer of gravel or broken pottery to the bottom of the container. This stops the drainage holes getting blocked by lumps of compost.
Half fill your container with general purpose compost, and you’re ready to plant!
Step 2 – Choose your plants
The best container gardens make use of larger containers with several plants in them. This helps create a mix of height, shape and colour for a stunning display.
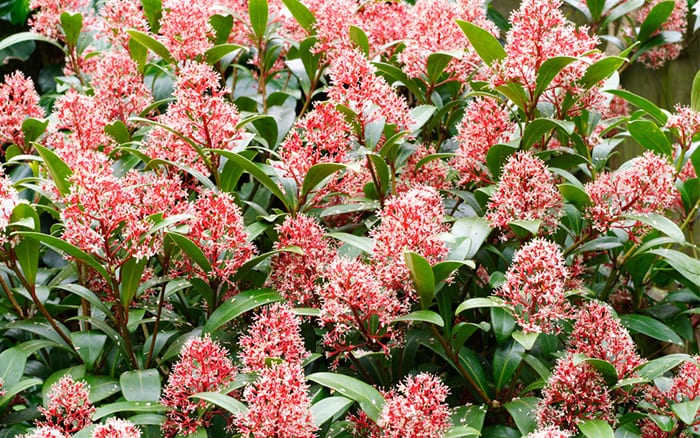
I always start with a centrepiece. This is usually a bigger feature plant that goes in the middle. In the video above, I’m using a Skimmia.
Great spring centrepieces
Skimmia japonica
Dwarf conifer (Cupressus Goldcrest is good)
Hebe
Osmanthus burkwoodii
Viburnum
Tall spring bulbs like daffodils and tulips
Around the centrepiece you need lower-growing, colourful bedding plants and flowerings varieties. In the video I use a selection of primroses, which have a vivid flower colour and nice leafy foliage.
Start with the large centrepiece. Carefully take off the pot and place the plant in the middle of the container. Nestle it into the compost so it sits straight and fill in with compost to hold it in place.
Next make small holes in compost around the edges where the bedding plants will go. Remove them from their pots and plant them as you did with the centrepiece.
Aim to make the container feel full and lush – nothing looks sadder than a half-empty flower pot. Firm in the soil to hold the plants in place and top-up with more compost if there are any gaps.
Try to get the final compost level a couple of centimetres below the rim of the pot. If you fill the container right to the top, compost will spill out when you try and water it. Now give the container a good water.
Step 4 – Where to put your spring container
Make the most of your spring containers by putting them somewhere you can see them clearly. This may be by the front door or on the patio near the kitchen window.
If you place your container against the side of the house you might need to give it a bit of extra water. This is because it will sit under the eaves and won’t get as much rainfall.
You can also lift pots up onto pot feet to help drainage. I use old wine corks!
Your stunning spring container should give you months of pleasure. Make sure to refresh it when the bedding plants start to die with some summer-flowering varieties like fuchsias and geraniums.
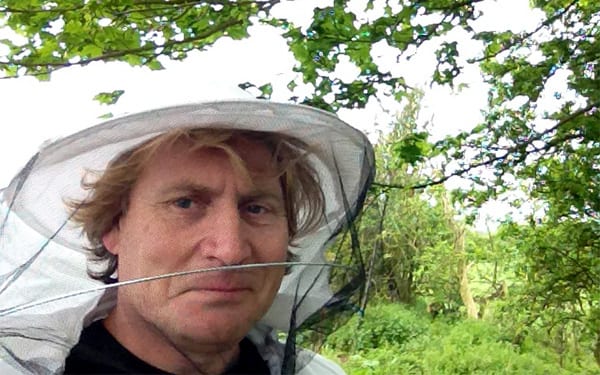
No doubt some of you know that I’m a beekeeper. I got my first colony in 2014 and now have three hives. Bees are vital for the environment and ecosystem as pollinators, and so much fun to keep!
But beekeeping is not just about looking after your own bees. Sometimes bee colonies set up home in the wild, often in houses, sheds and gardens. Experienced beekeepers can rescue wild bee colonies and move them to safety in a managed hive.
Just last week, a farmer found a wild colony when he was cutting a hedge along a roadside near Stratford-upon-Avon. He chopped off the top and discovered an active colony nestled among the branches.
He contacted a beekeeping farmer, who put him in touch with Brian Donley, chairperson of the Stratford and District Beekeeping Association.
Brian set out to visit the colony to assess the situation and what equipment was needed. The next day he returned and cut some of the hedge away. Then he was able to lift out the combs.
He placed it in type of beehive called a national hive with a double brood chamber. It’s a large one to take the length of the six combs the colony had built.
The cold weather meant that the bees remained tightly clustered and none of them flew out to try and defend their home. You can see them between the combs in the image below.
The colony is now back in Brian’s apiary with a big block of baker’s fondant on top. The bees were close to starving after spending so long withstanding frosty temperatures in the hedge. Now they have a safe home and plenty of food to build up their strength.
Brian estimates that the bees had probably been living in the hedge since last summer, because the comb was still a white-yellow colour and pretty clean.
It is unusual for a wild colony to set up home out in the open like this. And even more so for the bees to have survived this long into the winter, especially with all the wet and freezing cold we have had recently.
Finding a wild bee colony in a hedge is fairly rare. Bees usually build hives in hollow trees, but there aren’t many of those left today. Most of the time when people find a wild bee colony, they have set up home in a brick cavity in a house or down a chimney.
But if you do find wild bees in your house, garden, property or on your land, Brian’s advice is to leave them well alone! Contact your local beekeeping association with the details from the British Beekeeping Association website (BBKA).
It’s a charity that will send a volunteer beekeeper to check over the site and safely remove the colony.
Beekeeping is immensely rewarding for gardeners and I love it! You don’t need any formal qualifications to become a beekeeper, but you should join your local beekeeping association – find the details on the BBKA website.
The associations run local training courses to help you get set up. They will be able to put you in contact with other beekeepers so you can ask for advice and learn from them. They also run taster days throughout the year so you can go along and give it a try.

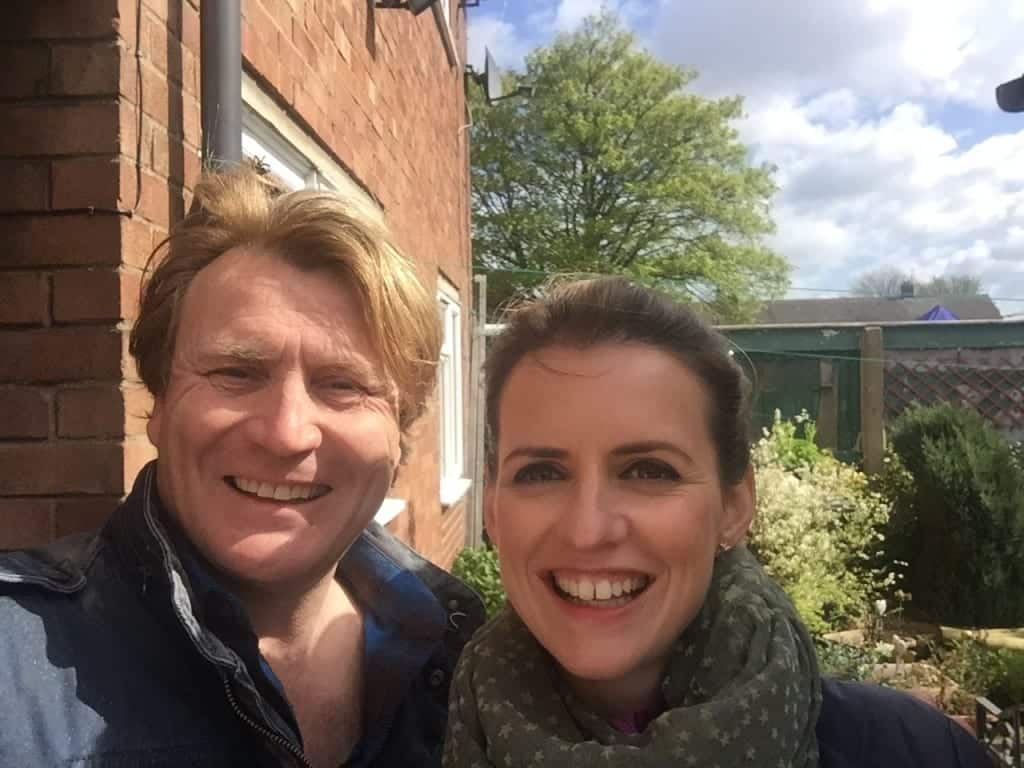 [/fusion_imageframe][fusion_text]Here’s Katie and I doing a selfie at the beginning of the day when our faces are smiling and free of mud, sweat and tears![/fusion_text][fusion_imageframe lightbox=”no” lightbox_image=”” style_type=”none” hover_type=”none” bordercolor=”” bordersize=”0px” borderradius=”0″ stylecolor=”” align=”none” link=”” linktarget=”_self” animation_type=”0″ animation_direction=”down” animation_speed=”0.1″ animation_offset=”” hide_on_mobile=”no” class=”” id=””]
  [/fusion_imageframe][fusion_text]Here is Frances with Matt from Frosts working on the front garden. We didn’t realise we were doing both the front and the back garden until we arrived, so that was a bit of a shock!
 [/fusion_imageframe][fusion_text]This is Marcus from frosts who helped us create this lovely front path. I love the curved brickwork here as it sweeps round to the front door.[/fusion_text][fusion_imageframe lightbox=”no” lightbox_image=”” style_type=”none” hover_type=”none” bordercolor=”” bordersize=”0px” borderradius=”0″ stylecolor=”” align=”none” link=”” linktarget=”_self” animation_type=”0″ animation_direction=”down” animation_speed=”0.1″ animation_offset=”” hide_on_mobile=”no” class=”” id=””]